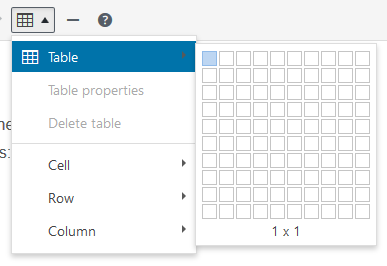
Create a table
- Click on the Table toolbar icon and use the grid selector to choose the number of columns/rows you need. You can add more later if necessary.
-
Insert your data into the newly created table.
- Depending on your theme, you can also style the table by placing your text cursor inside the table (any cell will do) and selecting a style from the Formats dropdown in the toolbar. Typically a Buzz theme will have two styles: Table Standard for a regular bordered table, and Table Banded for a table style with alternating coloured rows.
- To add a header row, right-click the row you want to make the header and in the pop-up, go to Row > Table Row Properties. From there, select the Row Type Header. This will bring the row to the top of the table and, depending on your theme, apply a header style.
- To add or remove columns and rows, the same process applies. Right-click the row or column you want to modify and use the options in the Row and Column menus to add/remove.
Modify a Table
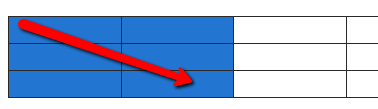
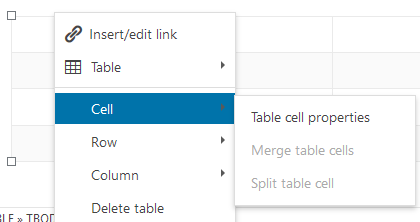
By default, the table will resize its columns to fit the width of the content, however sometimes you’ll want to set your own layout. To set the width of a column, select all the cells in that column and right click inside the selection to access the context menu. You can include multiple columns in the selection if you wish.
Select cell -> Table cell properties
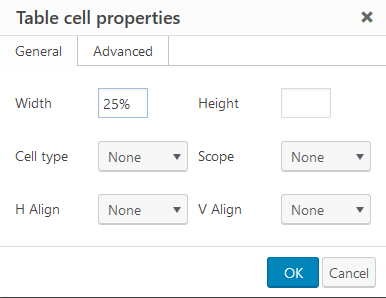
From here you can define the desired width. We recommend using percentages so that the table will scale gracefully to different screen sizes. For four even sized columns, set the width of each to 25%.
Delete a Table
The easiest way to delete a table is to right click inside it and select “Delete Table” from the context menu.