Create a campaign
To send out the newsletter to your subscribers, you first need to create a campaign.
- Publish the newsletter to be sent. You can’t create a campaign for a newsletter still in Draft or in a private/password-protected state.
- Go to Newsletters > Campaign Monitor and click the Create a Campaign tab.
- Select the published newsletter you want to use to create a campaign. The most recent newsletter will be at the top of the list.
- Choose a subject heading for your campaign.
- Select the contact list(s) you want the campaign to send to.
- Click Create Email Campaign.
Review and Send
Now that the campaign has been created, the newsletter can be sent out.
- In Newsletters > Campaign Monitor go to the Current Campaigns tab. You should see the campaign that was set up in the previous steps – if not, click the Refresh Campaign List button.
- Hover over the campaign and click Send.
- Review the data to make sure everything is okay. You can also send a last-minute test to yourself from this screen.
- If everything is in order, click Send Email Campaign. This will pop-up one final chance to confirm the send – no going back after this!
The campaign will now start sending out to the contact lists you specified.
Changing the defaults
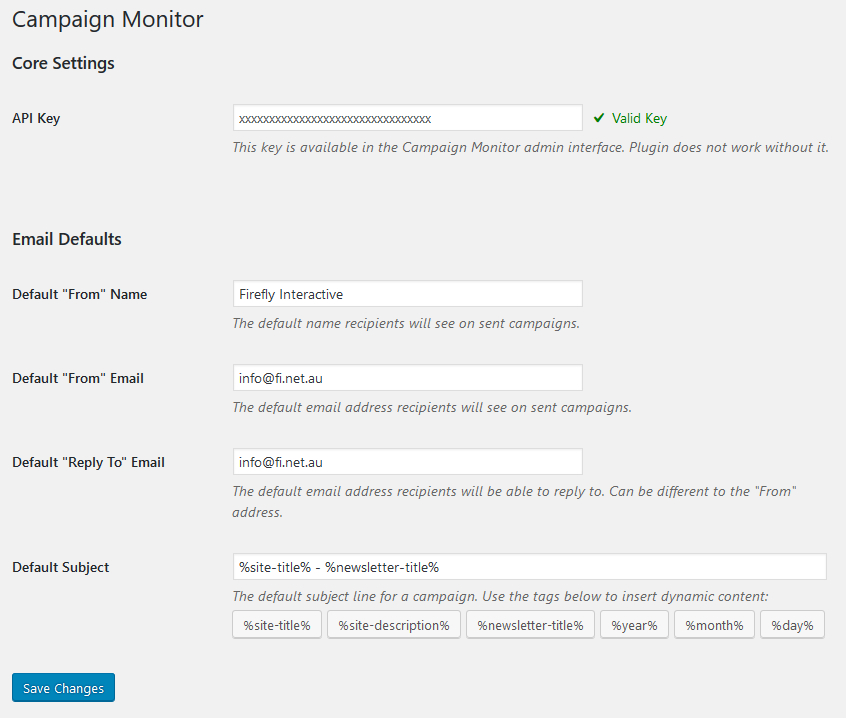
The Campaign Monitor Add on uses a settings page to store default values. To change these, go to Settings > Campaign Monitor.
 API Key – The key that lets this Add on interact with your Campaign Monitor account. Generally you won’t ever need to change this.
- Default “From” Name – The name that will be attached to your campaigns. Lets your subscribers know who the campaign is from.
- Default “From” Email – The email that will be attached to your campaigns. Lets your subscribers know who the campaign is from.
- Default “Reply To” Email – The email that will accept any replies a subscriber sends. Generally the same as the From email.
- Default Subject – The subject line of your campaign. This field uses template tags dynamically fill depending on the newsletter being sent. This field can be overwritten when creating a new campaign.
Tag Description %site-title% Replaces with the title of the site. eg. “The Buzz Newsletter” %site-description% Replaces with the description of the site. eg. “Your Newsletter, Your way.” %newsletter-title% Replaces with the title of the newsletter. eg. “Issue 1” %year% Replaces with the current year. eg. “2018” %month% Replaces with the current month. eg. “June” %day% Replaces with the current day. eg. “3”